 |
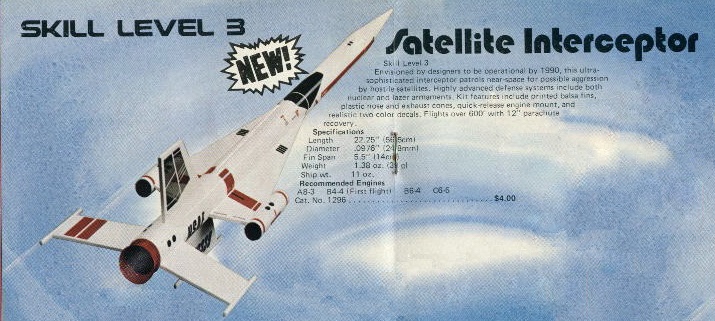
| Original Release - 1978 |
 |
| Re-release - 2010 |
Estes Satellite Interceptor first appeared in the 1978 Catalog and was discontinued in 1983. In 2010 it was re-released with a new kit# (3027) but was virtually identical to the original with 2 noteable exceptions. The nosecone of the original 1978 release was plastic (PNC-50BB) and included a tailcone. The 2010 re-release supplied a balsa nosecone and did not include the tailcone. Fortunately, for those of us purists who prefer to build a classic model in it's original configuration, Estes still manufactures PNC-50BB and included it in their "Crossfire ISX" kit (#7220) of which I had a duplicate to canibalize. The decals are an exact match of the original release. Although the 1978 catalog image gives the impression of a deeper red, scans of the 1978 decal sheet confirm that the colors of the re-release (which appear lighter) are indeed correct.
 |
| Figure 1 - Kit Contents |
As can be seen in Figure 1, the tailcone is conspicuosly absent and the nosecone is balsa. Other than that, the quality of the materials was typical of other Estes kits which is pretty good.
 |
| Figure 2 - Attaching the wings |
Construction began with attaching the wings. No issues here really. The wings are at 90 degrees from the body tube so it was no different than attaching fins to a conventional 4-FNC (4 Fins and a Nose Cone) design.
 |
Figure 3 - Attaching the rudder and tail pieces
|
 |
| Figure 3.1 - Satallite Interceptor Tail Geometry |
Probably the most difficult step in building this rocket is the placement of the aft stabilizer fins. The rudder is easy as it is also 90 degrees from the body tube, however the (not exactly) horizontal stabilizers are at an odd angle and glued to the body tube at a slightly offset postion from normal fin placement (see Figure 4).
 |
| Figure 4 - Wing tip pods |
The last pieces to attach were the bottom fin and the wingtip pods. Nothing out of the ordinary for either of those. Obviously care must be taken to ensure the wingtip pods are aligned perfectly parallel with the main body tube.
 |
| Figure 5 - Fillets |
I used simple 5-min epoxy fillets on the entire model. As long as you don't try to do too many (2 at the most) at one time, the epoxy remains "wet" enough to flow out to a nice even fillet. Sometimes I will put them near the bulb of my workbench lamp if necessary.
 |
| Figure 6 - Tailcone (stolen from Crossfire ISX) |
As mentioned above, I robbed the tailcone out of a spare "Crossfire ISX" kit I had. It is the exact same tailcone used in the original release of the kit and I think it adds alot to the overall appearance of the completed model. Also, as I mentioned before, I prefer to build a classic kit as close to the original as possible.
 |
| Figure 7 - Ready for primer |
 |
| Figure 8 - Primer and Paint |
As with all of my previous models, I first like to spray on a nice thick coat (or 3) of a good sandable primer. I'm still using the Dupli-Color "High Build" filler primer until I find something that works better.
 |
| Figure 10 - Decal application |
There are quite a few decals on this model and care must be taken to position everything correctly but the Estes supplied water-slide decals went on without a hitch.
 |
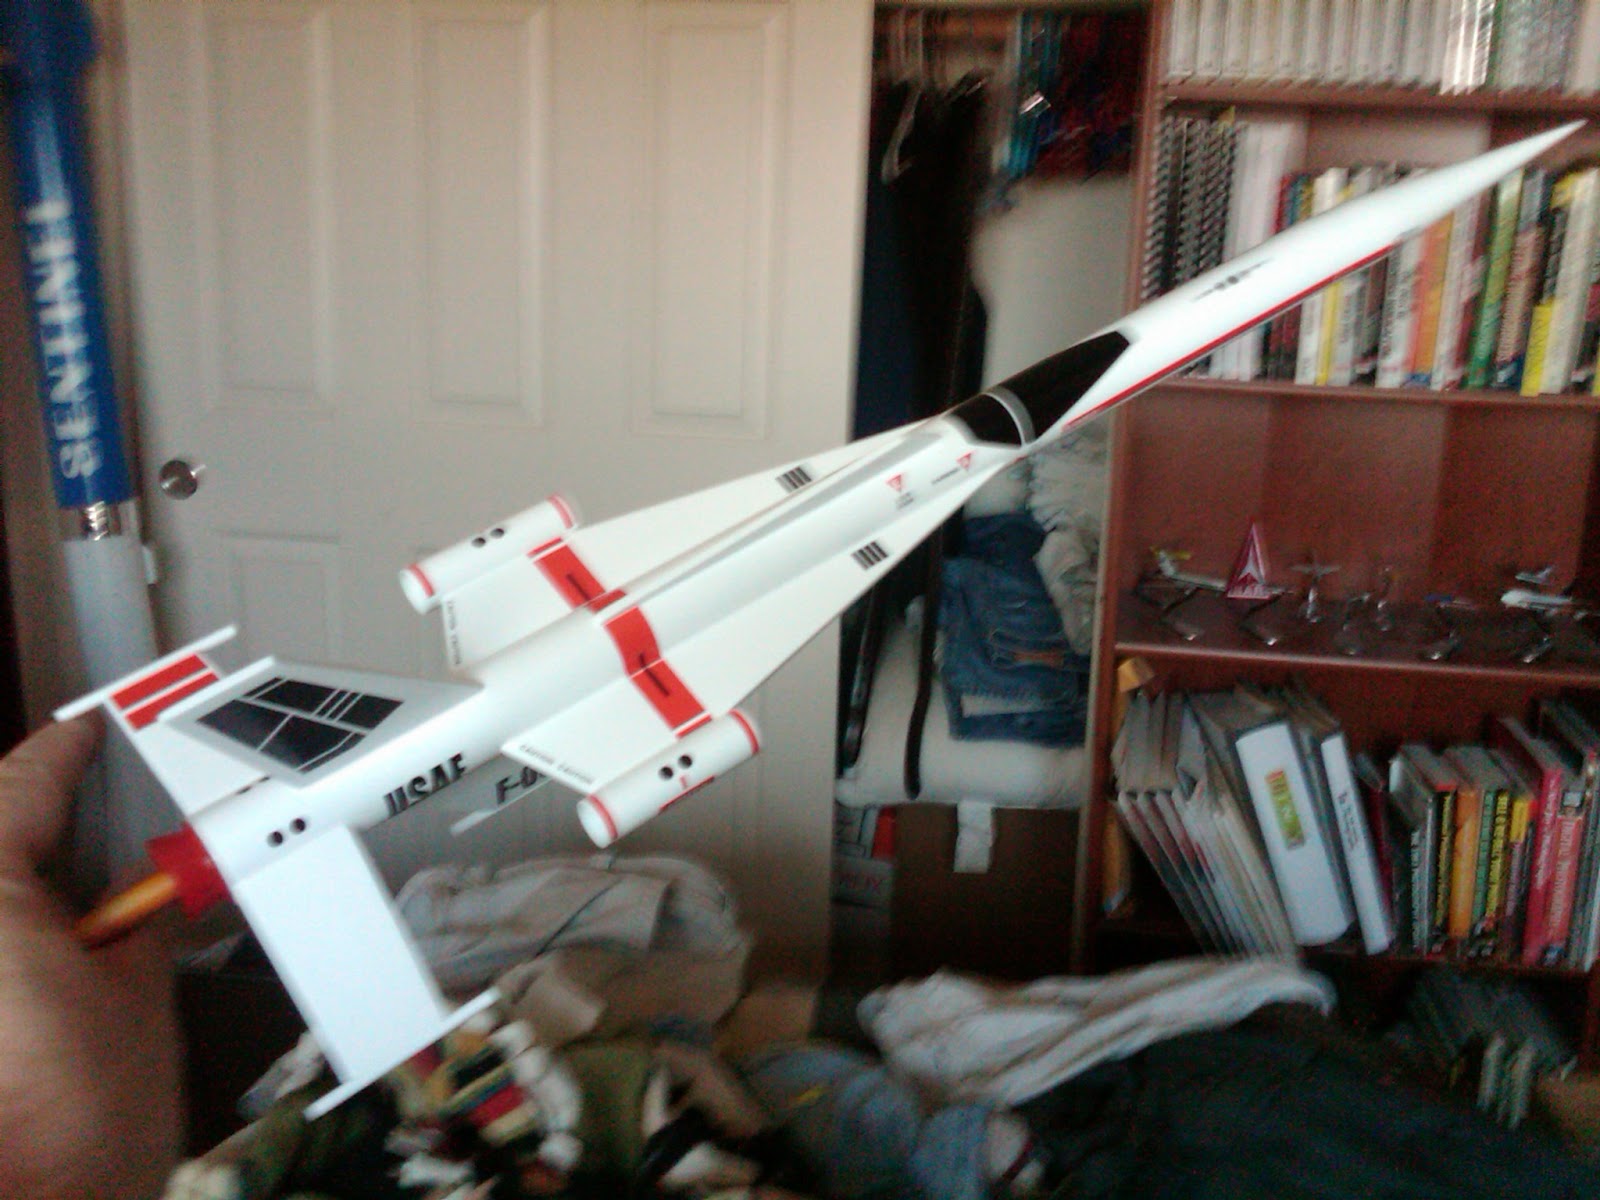
| Figure 11 - The Finished Satallite Interceptor |
One final note that isn't really caputured in the build pics is that near the end of construction, I decided to scrap the balsa supplied nosecone and switched to the plastic one that I had already canabalized for the tailcone. Again, it wasn't so much that you could see a big difference. In fact, you really couldn't see much of a difference, but I wanted to stay as faithful to the original 1978 version as possible and by switching the nosecone, it becomes virtually the same kit.
 |
| Figure 12 - On display |
All in all this was a fast, fun and easy build and I would recommend this kit to anyone who has an interest in the classic Estes kits. In particular, I love the Estes kits of the mid to late 70s and now this one stands proudly on my shelf as a reminder of happy times.


No comments:
Post a Comment